
How to Make an AI Christmas Photo: Six Steps From Your Picture
A plain walkthrough of how to make an AI Christmas photo: which picture to start with, which tool to open, how to set size and shape, what to type, and what to check before you share.
If you want to know how to make an AI Christmas photo that still looks like you, most of the work happens before you press a button. Decide first where the picture will end up: a square avatar, a tall portrait for a phone or a wide image for a card all need slightly different framing. The six steps below follow the Christmas PFP studio from upload to download.
You need one photo you are allowed to edit, a browser and a sentence or two about the setting. An ordinary phone picture is fine. If the photo shows a child, ask a parent or guardian first. Then work through the illustrated steps in order.
Step 1: Pick a sharp portrait
Choose a picture that is in focus and evenly lit, with the whole face showing and a little room around the head and shoulders. A relaxed expression and an uncluttered background give the AI less to guess about. Use a photo you own or have permission to use, and check with a parent or guardian before uploading a child’s picture.
A clear portrait with the whole face in view.
Step 2: Open the tool that fits the job
For a holiday portrait, open the AI Christmas photoshoot page. For a picture that will sit on a card, open the Christmas card generator and plan room for your words. To dress someone as Santa, open the Santa photo page. All three share the same upload and quality controls; they differ in starting shape and scene. Add your photo with the upload box or send it from your phone.
Open the tool and add your photo.
Step 3: Set size and shape
Pick 1K or 2K and one of the available shapes. Square suits an avatar, tall suits a single portrait, and wide leaves space for a greeting. A 1K image is 5 credits and a 2K image is 10. After changing the size, read the credit number under the create button and make sure the face is not crowded by the frame.
Choose a size and a shape that suit the picture.
Step 4: Write one focused scene
Type a short request built around a single setting, such as warm tree lights, a red knit sweater and a plain room. For a card picture, ask for open space beside the person and add the words later in your card editor. Stick to one mood for props, colors and light instead of mixing several ideas.
Type the holiday details that make it yours.
Step 5: Check everything before you create
Look over the chosen photo, the shape and your scene text. The create button shows its label with the credit cost right below it. Make sure the shape matches where the picture is going. A single clear idea and a sharp face make the result easier to judge.
Step 6: Inspect the result
View the result at full size and hold it up against your original photo. Look closely at eyes, teeth, hands, the edge of any hat and objects in the background. If it is an avatar, also look at it at the small size it will be shown. For a card, add names in your editor, proofread every line and check the crop. Keep your original photo too.
Other holiday effects
Some occasions call for a different effect. Santa Nice List puts a child’s portrait and name on a playful, unofficial certificate; it is a finished image, not a blank printable. Christmas pets makes portraits of one pet or two. Each one asks for its own inputs and has its own default shape.
About the AI Christmas photo trend
The AI Christmas photo trend is simple: instead of booking a holiday shoot, people take a photo they already have and ask an AI tool to add the season around it, from a Santa hat to a snowy street. The steps above are how to do that with care, so the face stays recognizable and the scene stays believable.
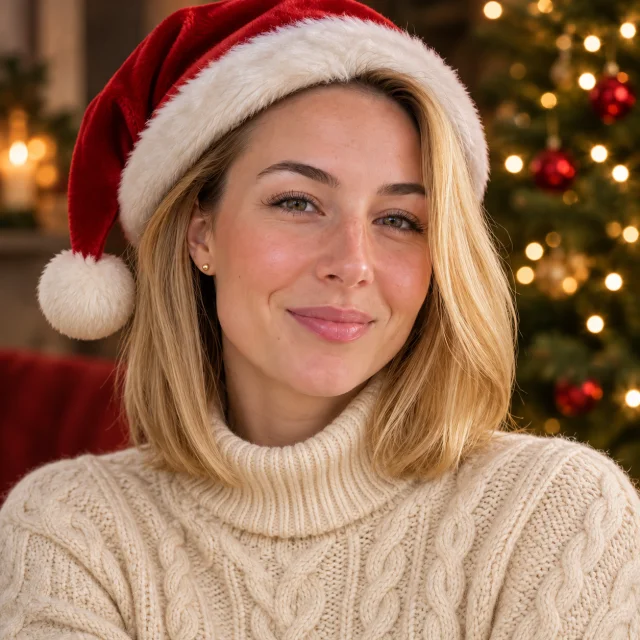
Illustration: a portrait in a red Santa hat with soft tree lights behind.
Questions
How to make an AI Christmas photo: questions
Pick a sharp portrait, open the matching tool, choose size and shape, and describe one focused scene. Read the credit cost under the create button, then check the face, the holiday details and the crop before sharing.
One that is in focus, evenly lit and shows the whole face with some space around the head. Skip sunglasses, heavy filters and crowded group shots. Use only photos you may edit, and get a parent’s or guardian’s consent for a child.
No. Everything happens in the browser with a photo you already have. A well-lit phone picture and a short scene description are enough to start; each image uses credits, shown before you press create.
Yes. Make the picture, then place it in your card editor and add your message there. Leave margins around the face and text, and follow your printer’s guidance on file size and layout.
No. Santa Nice List produces a finished, just-for-fun image with a child’s portrait and name already on it. Use it when you want a named keepsake with a short message.
No. Every effect makes a still picture from your photo; there is no live call with Santa.
Ready to start?
Pick your source photo and open the tool below, or choose another holiday tool from the list.
Open the Christmas photoshoot studioHoliday photo tools
- AI Christmas photoshoot — Holiday portraits from one photo, with four looks and tips for a good likeness.
- Christmas photo prompts — Thirty ready-made prompts for couples, families, pets, solo shots and avatars.
- Christmas card generator — A wide holiday picture with space for a greeting you add in your own editor.
- AI Santa photo — The person in your photo dressed in Santa’s hat and coat.
- AI Christmas wallpaper — Holiday decorations added to your own photo, sized for a phone or a desktop.
- AI Christmas background — A wide festive scene from a photo or a description, for calls, banners and cards.